Google Direct Connect
RECOMMENDEDConnect your Google Ad Manager account securely in one click. Google-approved with verified branding.
What is Google Direct Connect?
Google Direct Connect is NoAdCode's secure way to link your WordPress site to Google Ad Manager. Unlike other methods, your credentials and tokens stay in YOUR Google account - not on third-party servers.
Google-Approved
NoAdCode is the first WordPress plugin with official Google branding approval for GAM integration.
Your Data, Your Account
Tokens stored securely in your Google account. Revoke access anytime from your Google security settings.
One-Click Setup
No Google Cloud Console configuration. No client IDs or secrets to manage. Just sign in and go.
Non-Restrictive Scopes
Only requests the permissions needed for ad serving. No access to sensitive data or admin functions.
Connection Methods Comparison
| Method | Best For | Setup Complexity | Status |
|---|---|---|---|
Google Direct ConnectRECOMMENDED | All users | One click | Active |
Direct OAuthADVANCED | Enterprise / Compliance | Google Cloud Console setup | Available |
NoAdCode HubLEGACY | Legacy users only | Manual configuration | Deprecated |
Setup Steps
Open Settings
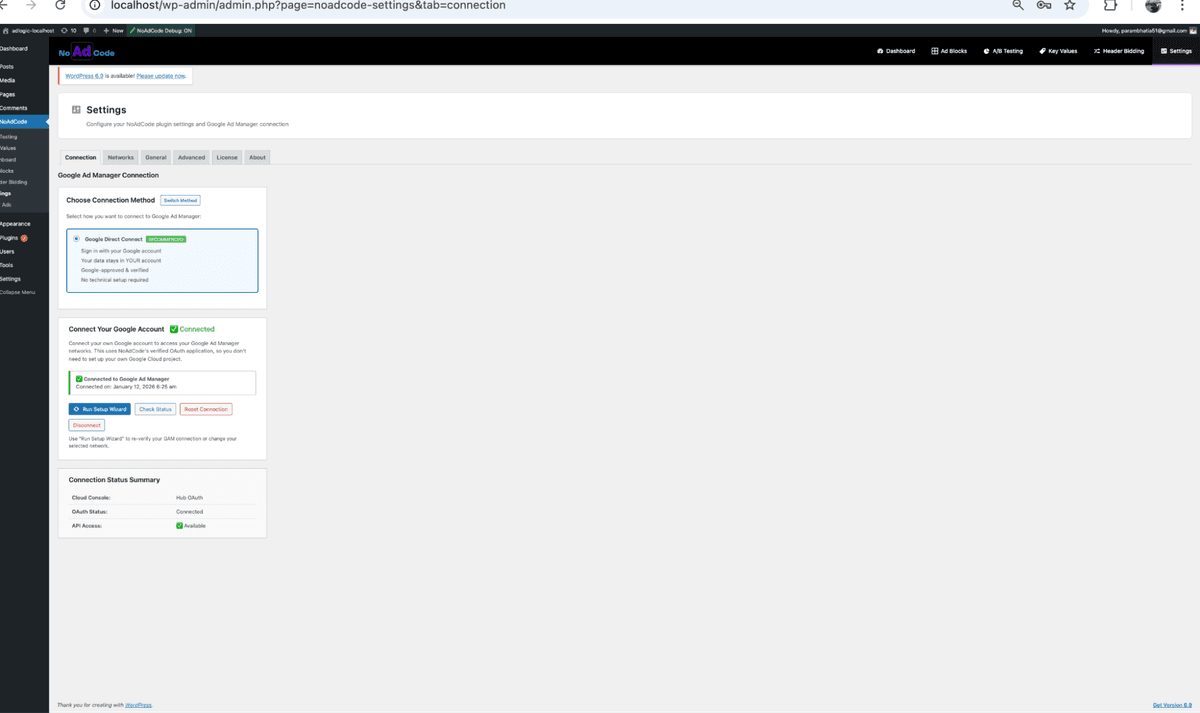
In your WordPress admin, click NoAdCode → Settings. You'll see the "Google Ad Manager Connection" section.

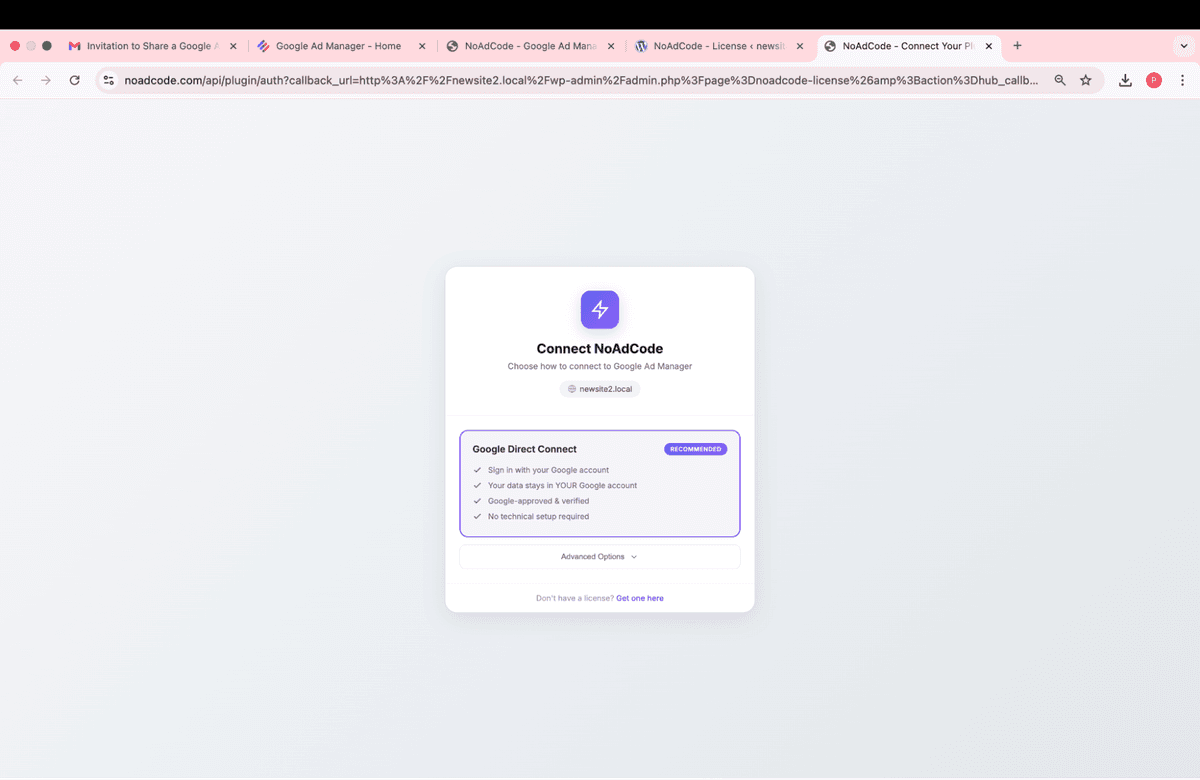
Select Google Direct Connect
Click the Google Direct Connect option (marked as RECOMMENDED). A popup will open to begin the authentication flow.
Look for: "Sign in with your Google account. Your data stays in YOUR account. Google-approved."
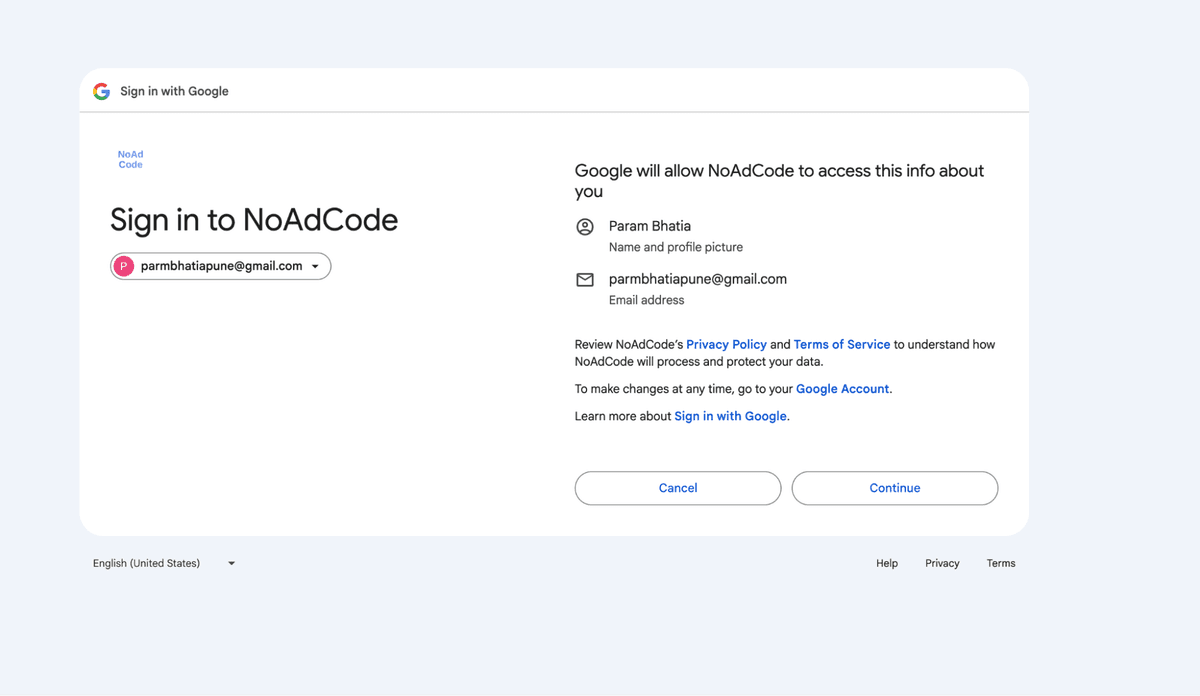
Sign in with Google
In the popup, you'll see Google's official sign-in page with NoAdCode's verified branding. Select the Google account that has admin access to your GAM network.
Tip: Make sure you select an account with GAM admin access, not just a regular Google account.
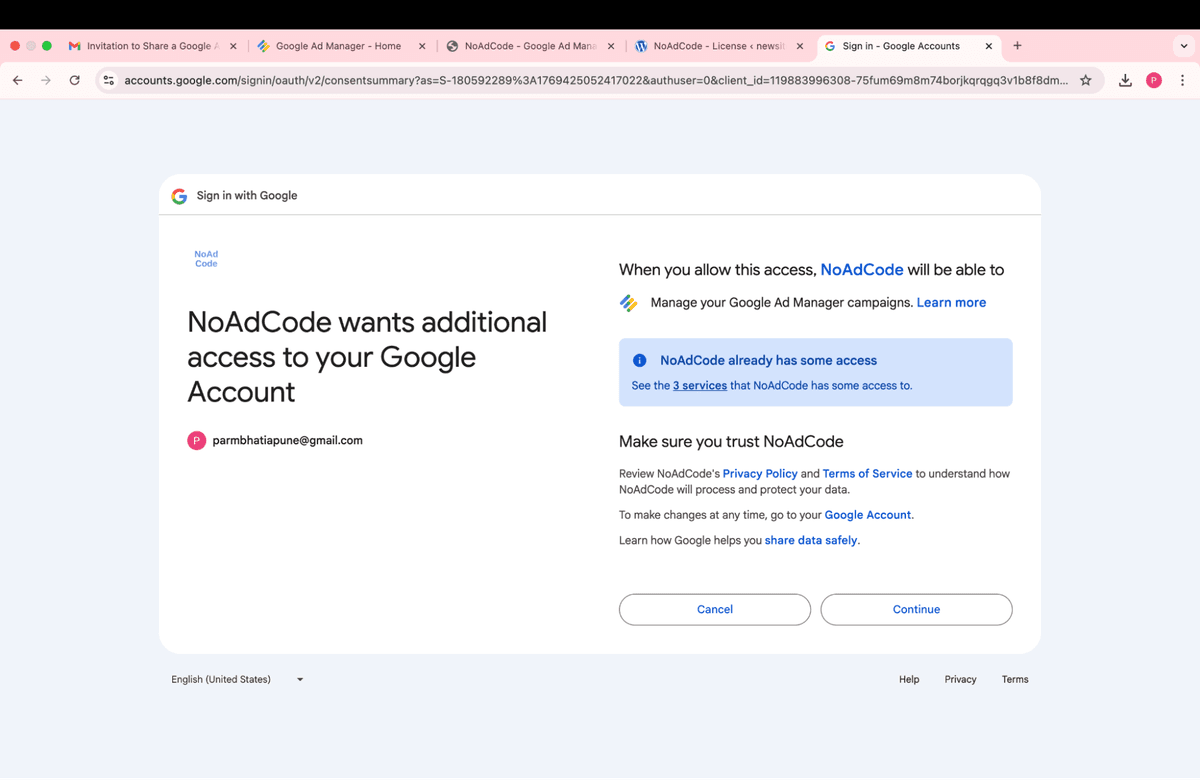
Grant GAM Permissions
Google will show you the permissions NoAdCode is requesting. These are read-only permissions for your GAM account - we don't need admin or billing access.
Permissions Requested:
- View your Google Ad Manager networks
- Access ad unit configuration
- View basic account information
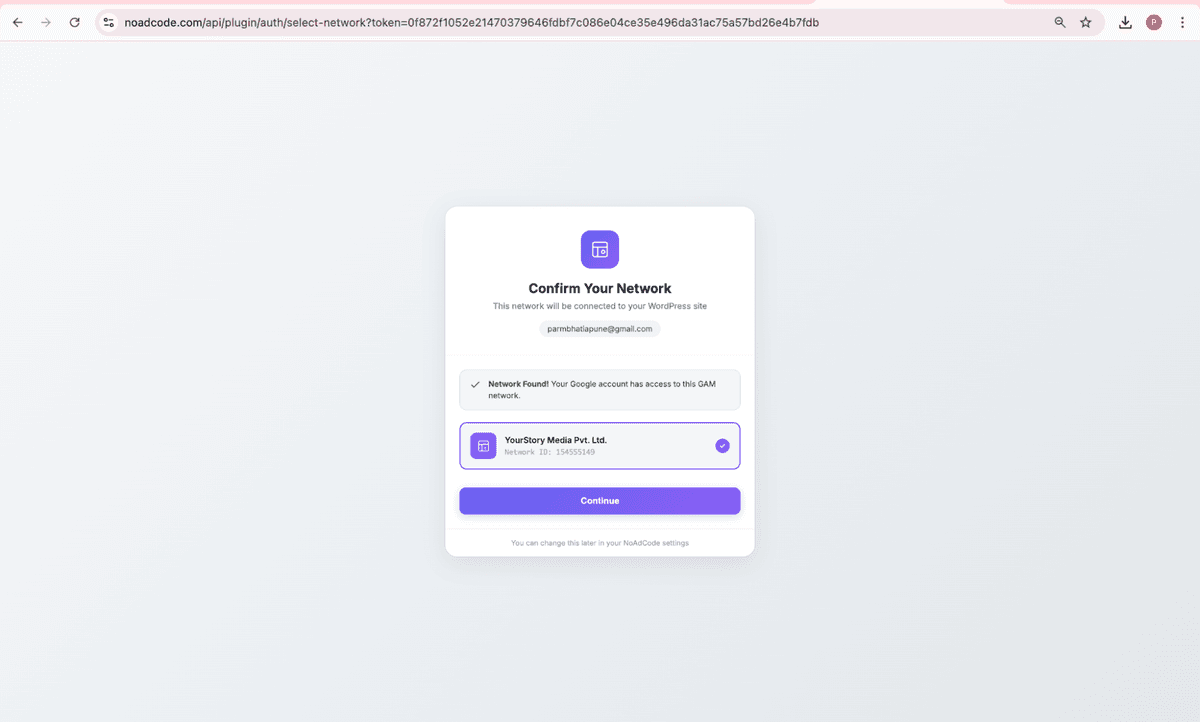
Select Your GAM Network
If you have access to multiple GAM networks, you'll see a list to choose from. If you only have one network, it'll be selected automatically.
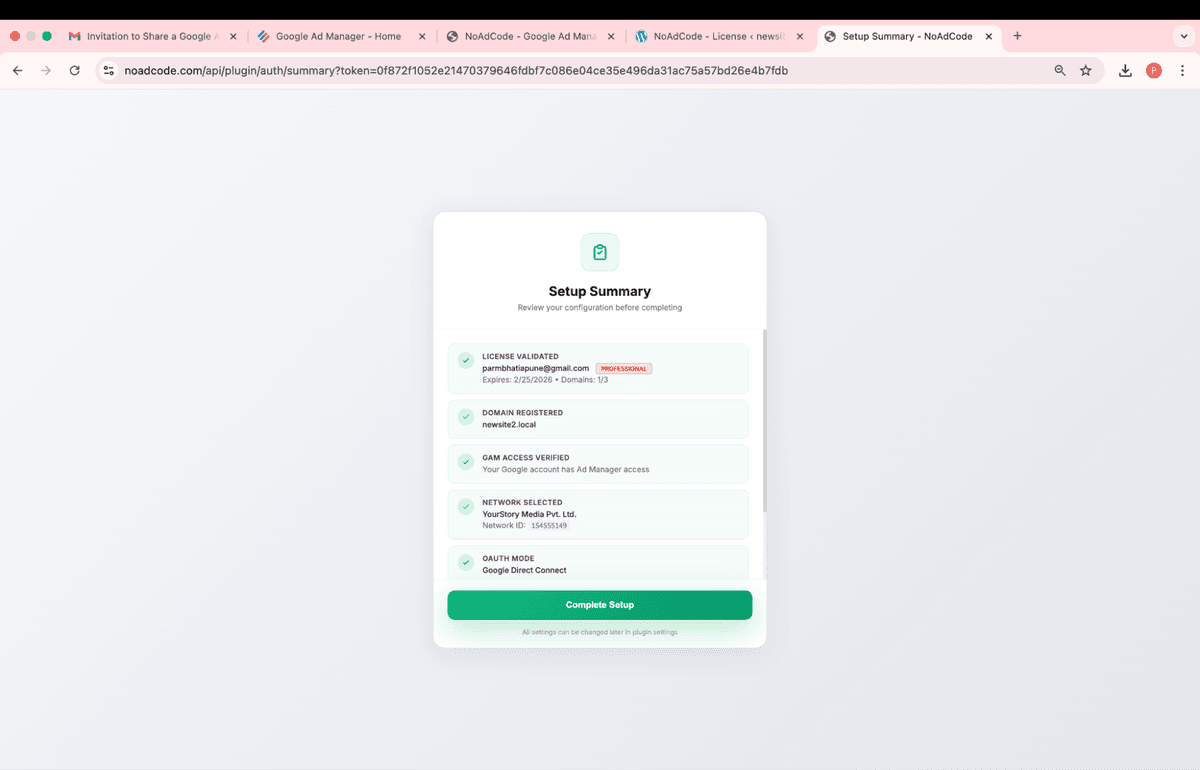
Review Setup Summary
You'll see a summary showing all validation steps completed: License validated, Domain registered, GAM access verified, and Network selected.
Connection Complete!
The popup will close and you'll see a success message in WordPress. Your connection status will show as "Connected" with a green checkmark.
Troubleshooting
"No GAM Networks Found"
This means the Google account you signed in with doesn't have access to any GAM networks.
- Verify you have admin access to a GAM network
- Try signing in with a different Google account
- Ask your GAM admin to add your account
"License Not Found"
Your email isn't linked to a NoAdCode Pro license.
- Make sure you're signing in with the email used for your Pro purchase
- Contact parambhatia51@noadcode.com if you believe this is an error
Popup Doesn't Open
Your browser might be blocking popups.
- Check your browser's popup blocker settings
- Allow popups for your WordPress admin domain
- Try a different browser if issues persist
You're Connected!
Now that your GAM account is linked, you can start creating ad blocks and monetizing your content.